In summary:
- Transform your small living space into a developmental gym by viewing floors, stairs, and furniture as tools for movement.
- Prioritize barefoot time indoors to enhance sensory feedback and strengthen foot muscles, critical for balance and walking.
- Create “scaffolded risks” like cushion paths or backward stair practice to build skills safely, rather than avoiding all challenges.
- Ditch passive “container” seats like Bumbos in favor of active floor play that builds essential core strength.
- Strategically place toys and use mirrors to create a “Motivation Triangle” that intrinsically encourages crawling and exploration.
For parents living in apartments or compact homes, the sight of a baby eager to move can be a mix of joy and anxiety. Every coffee table corner becomes a hazard, and the limited floor space feels more like a barrier than a playground. The common advice to “baby-proof everything” often leads to a restrictive environment, while buying another bulky play-gym only adds to the clutter. This approach focuses on containing the child, not enabling them.
But what if the very limitations of your space—the texture of the floor, the single step into the kitchen, the path around the sofa—are actually your greatest assets for development? What if you could think like a pediatric physiotherapist and a spatial designer, architecting movement within your existing footprint? This guide reframes your home from a simple container into a purposeful gymnasium. It’s not about buying more things; it’s about seeing your environment through the lens of motor development and transforming it into an intentional “Yes Space” that invites movement, builds strength, and accelerates skills safely.
We will explore the science behind how different surfaces impact crawling and why barefoot is best for learning to walk. We will deconstruct how to teach stair navigation safely, compare key active play investments, and reveal the common mistakes that can inadvertently weaken your child’s core. Get ready to map out a home that says “yes” to growth.
Summary: A Practical Guide to Engineering Movement at Home
- Why Carpet vs Hardwood Impacts Learning to Crawl Differently?
- How to Teach Your Toddler to Descend Stairs Safely Backwards?
- Pikler Triangle vs Foam Blocks: Which Investment Lasts Longer for Active Play?
- The “Bumbo Seat” Mistake That Weakens Core Muscle Development
- How to Use Uneven Terrain to Improve Your Child’s Balance Naturally?
- How to Set Up a “Yes Space” That Encourages Crawling safely?
- Why Skipping Tummy Time Leads to Flat Head Syndrome (Plagiocephaly)?
- Barefoot vs Shoes: What Is Best for a Learning Walker?
Why Carpet vs Hardwood Impacts Learning to Crawl Differently?
From a physiotherapy perspective, the surface your baby learns to crawl on is not just a floor; it’s their first piece of developmental equipment. The difference between carpet and hardwood lies in two key physical principles: friction and stability. A low-pile carpet provides excellent grip, allowing a baby to push off with their hands and knees without slipping. This friction creates a stable base, giving them the confidence to propel forward. Hardwood, on the other hand, is a low-friction surface. Babies often struggle as their hands and feet slide out from under them, leading to frustration and what looks like a “swimming” motion on the floor.
This isn’t just an observation; it’s backed by research. A Japanese study published in Applied Ergonomics examined how different flooring affected infant crawling. The findings were clear: infants on hardwood floors had a significantly lower crawling rate and kept their hands on the floor longer, indicating less efficient movement. The surface type directly influences the quality and progression of motor development outcomes.
However, this doesn’t mean you need to re-carpet your home. The goal is to create zones of ideal texture. A firm play mat or even a large yoga mat placed on a hardwood floor can provide the perfect amount of grip needed for learning. This creates an intentional “crawling track” that builds motor skills effectively. The key is to provide a surface that offers just enough resistance to build strength without causing excessive slipping.
- Use yoga or play mats on hard floors to create ideal crawling conditions with proper grip.
- Let baby practice with bare feet and knees for maximum surface contact and sensory input.
- Position non-slip mats strategically in main play areas to create dedicated crawling zones.
- Create pathways with varying textures (e.g., mat to rug) for enhanced sensory development.
- Ensure all mat edges are secured to prevent them from sliding on the hardwood surface.
How to Teach Your Toddler to Descend Stairs Safely Backwards?
In a small or multi-level home, stairs are not a hazard to be gated off forever; they are a built-in climbing gym. Teaching a toddler to navigate them safely is a crucial life skill and a fantastic gross motor workout. The safest and most developmentally appropriate method is descending backwards, feet-first. This technique lowers the center of gravity, provides multiple points of contact (hands and knees), and gives the child full control over their speed. It builds upper body strength, coordination, and spatial awareness.
The teaching process should be gradual, positive, and patient. Start on a small scale, using just two or three stacked cushions or foam steps, before moving to the actual staircase. Your role is to be the guide and safety net, not the one doing the work for them. The goal is to build their motor planning skills so they can assess and navigate the challenge independently.

As you can see in the image, the parent’s hands are ready but not interfering, allowing the child to feel the motion themselves. This process of “scaffolded risk”—where the challenge is real but the environment is controlled—is fundamental to building both physical skills and confidence. Verbal cues like “tummy to the floor” or “find the step with your feet” help connect the physical action to a mental command.
- Start with 2-3 foam steps or a cushion stack for safe, low-stakes practice.
- Place an engaging toy at the bottom to motivate the desire to descend.
- Teach a “Stop, Look, Turn” verbal cue at every edge, including beds and sofas.
- Guide your child to turn their body so their tummy faces the top of the stairs.
- Initially, practice by having them slide down on their belly, feet-first.
- Progress to a hands-and-knees backwards crawling motion down the steps.
- Celebrate each successful descent with enthusiasm to build confidence and positive association.
Pikler Triangle vs Foam Blocks: Which Investment Lasts Longer for Active Play?
When investing in active play equipment for a small space, parents often face the choice between a structured climber like a Pikler Triangle and open-ended building materials like foam blocks. While both promote gross motor skills, they serve different developmental purposes and have different longevity factors. A Pikler Triangle is a specialist tool designed for a specific phase: learning to pull up, cruise, and climb. It offers a structured challenge that builds upper body strength and coordination in a predictable pattern. However, its use is largely confined to the 6-month to 5-year age range.
Foam blocks, in contrast, are a long-term investment in creativity and problem-solving. While they don’t offer the same vertical climbing challenge as a Pikler, they encourage a wider range of motor skills. Children use their full bodies to lift, stack, and arrange the blocks, developing spatial awareness and full-body kinesthetic sense. Their open-ended nature means they evolve with the child, transforming from a simple step to climb on into materials for building forts, obstacle courses, and collaborative creations with friends.
This table, based on insights from sources like an analysis of gross and fine motor skills, breaks down the key differences to help you decide which better fits your space and long-term goals.
| Feature | Pikler Triangle | Foam Blocks |
|---|---|---|
| Age Range | 6 months – 5 years | 9 months – 8+ years |
| Primary Skills | Climbing, pulling up, balance | Building, problem-solving, creativity |
| Play Type | Individual mastery, structured challenge | Collaborative, open-ended creation |
| Space Required | Fixed footprint (4×3 feet) | Flexible, expandable |
| Motor Development | Specific climbing patterns, upper body strength | Full-body kinesthetic, spatial awareness |
| Longevity Factor | Limited to gross motor phase |
Ultimately, the “better” investment depends on your priority. If your goal is to master climbing in a dedicated zone, the Pikler is excellent. If you want a versatile tool that grows with your child’s imagination and social skills while still promoting movement, foam blocks offer greater longevity. The skills developed through block play extend beyond just movement. As the Experience Early Learning Research Team notes in an article on how children develop gross motor skills:
The spatial reasoning, patterns and sequencing skills required for throwing a ball or other movement-based activities build skills in math and logic.
– Experience Early Learning Research Team, How Children Develop Gross Motor Skills
The “Bumbo Seat” Mistake That Weakens Core Muscle Development
In the quest to help babies sit up, many parents turn to “container” devices like the Bumbo seat. While they seem helpful, from a physiotherapy standpoint, they can be counterproductive to natural core muscle development. These seats lock a baby into a seated position with a wide base and high back, creating passive stability. The chair does the work, so the baby’s deep postural muscles—the very muscles needed to achieve and maintain independent sitting—don’t have to engage. The baby is contained, not strengthened.
True core strength develops when a baby works against gravity on the floor. When they push up during tummy time, pivot to reach a toy, or wobble while learning to sit, their trunk muscles are constantly firing and adapting. This active process builds the strength and coordination necessary for all subsequent gross motor skills, from crawling to walking. Over-reliance on container seats can delay the development of this foundational stability. The American Academy of Pediatrics recommends infants and toddlers get around 180 minutes of activity spread throughout the day, and this active time is most effective when it is self-directed on the floor.
Instead of propping your baby in a seat, focus on creating a floor environment that encourages active stability. This doesn’t mean leaving them to struggle unsupported. It means using simple tools to provide “scaffolded sitting,” where they get just enough help to practice but still have to use their own muscles. This active engagement is the true secret to building a strong, stable core.
- Prop your baby over a nursing pillow for supported tummy time, which makes it easier for them to lift their head.
- Use a rolled-up towel under their chest for gentle elevation during play on their tummy.
- Practice side-lying play, propped with a pillow behind their back, to strengthen lateral core muscles.
- Create ‘scaffolded sitting’ by placing pillows in a U-shape behind them, allowing their core to engage while providing a soft landing if they topple.
- Alternate between back, tummy, and side-lying positions every 15-20 minutes to work different muscle groups.
How to Use Uneven Terrain to Improve Your Child’s Balance Naturally?
A flat, predictable floor is great for learning to crawl, but once a child is pulling up and starting to walk, the best way to improve their balance is to introduce instability. Walking on uneven terrain—like grass, sand, or an indoor “proprioception path”—forces the small muscles in the feet and ankles to make constant, tiny adjustments. This process builds a powerful proprioceptive feedback loop. Proprioception is the body’s sense of its position in space. By challenging it, you are training the brain and muscles to communicate more effectively, leading to better balance, coordination, and body awareness.
You don’t need a backyard to do this. You can easily create a proprioception path in your living room using everyday objects. The goal is to create a pathway with a variety of textures and heights that encourages your child to slow down, pay attention, and adapt their movements. This isn’t about making it difficult; it’s about providing rich sensory input that their nervous system can learn from. It’s movement architecture at its most creative.
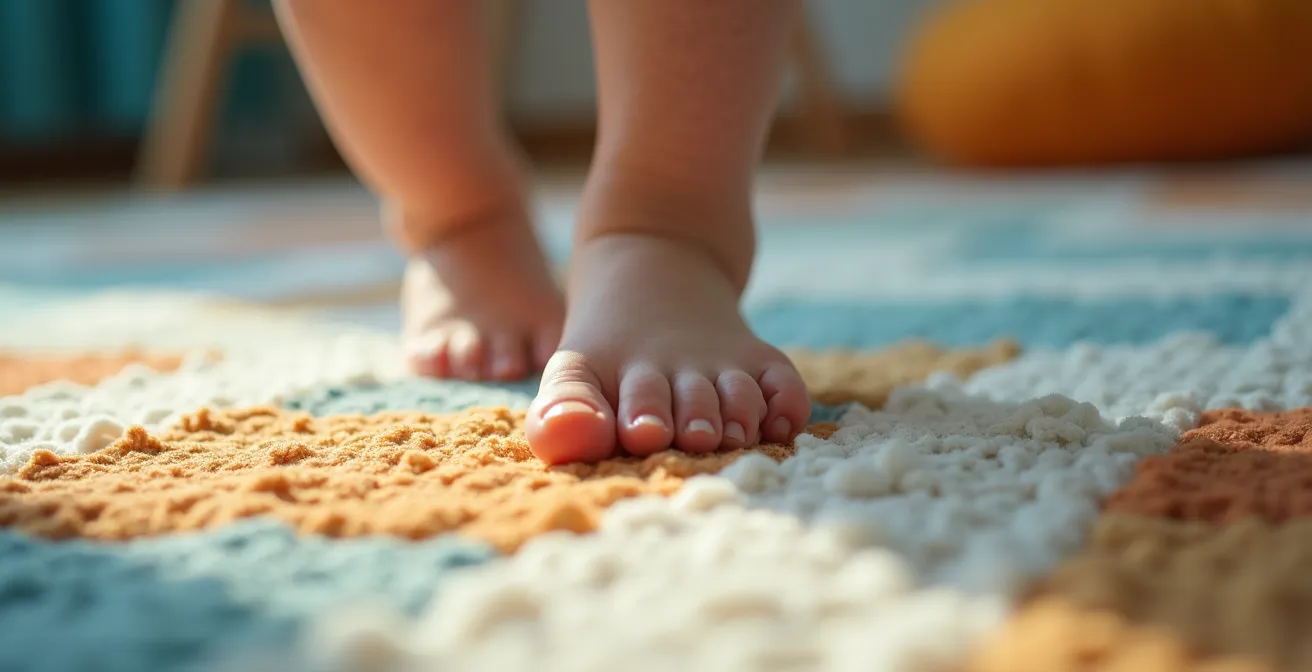
Notice how the child’s foot in the image must adapt as it moves between different surfaces. This micro-adjustment is where the learning happens. The foot is not just a base; it’s a sensory organ gathering information about the world. An indoor obstacle course made of pillows and blankets is one of the most powerful and space-efficient tools for developing advanced balance skills.
- Layer different textures: use pillows (soft), couch cushions (firm but unstable), and folded blankets (lumpy) to create a path.
- Add a patch of bubble wrap for a surprising sensory texture and auditory feedback.
- Create slight height variations with sturdy books or foam blocks that they must step up and down from.
- Use a line of painter’s tape on the floor as a “balance beam” to practice walking in a straight line.
- For advanced walkers, challenge them to navigate the path while carrying a soft toy to further test their stability.
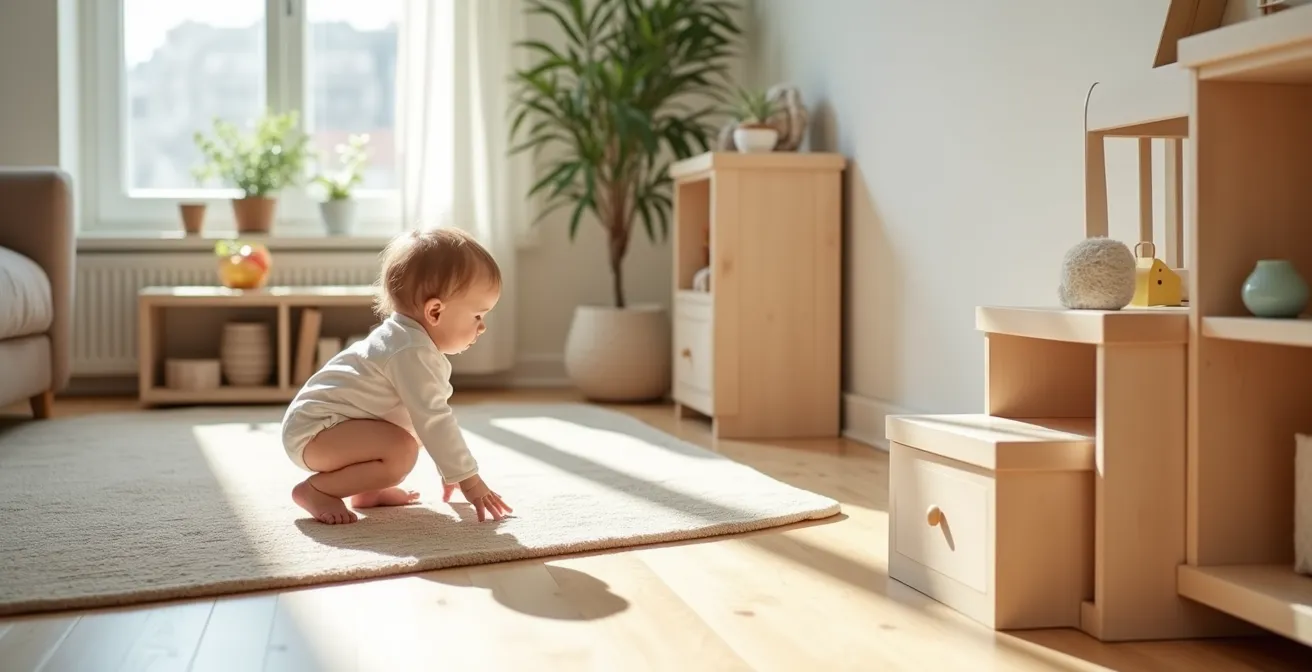
How to Set Up a “Yes Space” That Encourages Crawling safely?
A “Yes Space” is more than just a baby-proofed area. It is a thoughtfully designed environment where everything the child can reach is safe and engaging. It is a space of 100% acceptance, freeing you from saying “no, don’t touch that!” and freeing your child to explore with confidence. In a small home, this might not be the entire house, but a designated, well-defined zone. The primary goal of a Yes Space for a pre-crawler is to build motor intentionality—creating a compelling reason for them to want to move from point A to point B.
While most babies begin to crawl between 6 and 10 months, the desire to do so is often sparked by curiosity. A powerful strategy for this is the “Motivation Triangle.” This involves arranging three key elements—the parent (as a safe “home base”), a fascinating object (like a mirror), and a desirable toy—in a triangular formation. The clear sight lines between these points encourage the baby to pivot, reach, and eventually move across the space to get from one point of interest to another. This turns the open floor from an intimidating void into a purposeful map.
The flooring in this zone is also critical. As we’ve discussed, it needs to have a slight grip to prevent slipping. A firm play mat or a low-pile rug is ideal. By engineering the space with both motivation and the right physical support, you create an environment that actively teaches crawling rather than passively waiting for it to happen.
Your Action Plan: Setting Up the Motivation Triangle
- Establish Home Base: Position yourself as one corner of the triangle. Your presence provides the security needed for exploration.
- Install a Focal Point: Place an unbreakable, baby-safe mirror at the baby’s eye level on the floor to form the second corner. Babies are fascinated by faces, especially their own.
- Place the Prize: Set a single, highly engaging toy (one that makes a gentle noise or has a bright color) as the third point to complete the triangle.
- Ensure Clear Sight Lines: Make sure the baby can see you, the mirror, and the toy from any point within the triangle, encouraging them to pivot and turn their body.
- Choose Proper Flooring: The entire Yes Space should be on a surface that provides grip, like a firm play mat or low-pile rug, to support their efforts to push up and move.
Key Takeaways
- Your environment is your most powerful tool; view floors, stairs, and furniture as opportunities for movement, not just obstacles.
- Barefoot is the default for development. It provides essential sensory feedback and strengthens the 26 bones and 33 joints in the foot.
- Create “scaffolded risks” like cushion paths or backward stair practice. Safe, controlled challenges build skills and confidence far more effectively than avoidance.
Why Skipping Tummy Time Leads to Flat Head Syndrome (Plagiocephaly)?
Since the “Back to Sleep” campaign was introduced to reduce the risk of SIDS, babies spend significantly more time on their backs. While this is crucial for safe sleep, it has led to a rise in a condition called positional plagiocephaly, or flat head syndrome. A baby’s skull is very soft and malleable, and constant pressure on one spot can cause it to flatten. Tummy time is the direct antidote to this. It’s not just about preventing a flat spot; it’s about actively building the muscles needed to overcome it.
When a baby is on their tummy, they must work against gravity to lift their head. This single action strengthens their neck, shoulder, and upper back muscles. As these muscles get stronger, the baby gains better head control and naturally starts to turn their head from side to side when lying down, distributing pressure more evenly across the skull. Without this strength, they tend to lie with their head in one preferred position, exacerbating the flattening.
Many parents get discouraged because their baby fusses during tummy time. This is normal! It’s hard work for them. The key is not to force long sessions but to integrate short, frequent bursts of “tummy-down” time throughout the day. Even 2-3 minutes at a time after each diaper change adds up. And tummy time doesn’t always have to be on the floor; there are many alternative positions that achieve the same muscle-building goals while being more enjoyable for a resistant baby.
- Tummy-to-Tummy: Lie back in a reclined position and place your baby on your chest. They will lift their head to look at you.
- Football Hold: Carry your baby face-down along your forearm, supporting their chest with your hand. The gentle movement is often calming.
- Lap Time: Sit on the floor or a chair and lay your baby across your lap. You can gently rub their back or show them a toy.
- Side-Lying Play: Prop your baby on their side with a rolled blanket behind their back. This takes pressure off the back of the head and strengthens oblique muscles.
- Towel Support: Place a small, rolled-up towel under your baby’s chest and armpits during floor time. This little lift makes it easier for them to push up and look around.
Barefoot vs Shoes: What Is Best for a Learning Walker?
For a child learning to walk, their feet are not just for support; they are sophisticated sensory organs. In fact, according to Pampers’ overview of baby gross motor skills, the sole of the foot contains over 200,000 nerve endings. When a child is barefoot, these nerves send a constant stream of information to the brain about the texture, temperature, and inclination of the ground beneath them. This rich feedback is essential for developing balance, coordination, and a natural gait. Being barefoot allows the toes to spread and grip the floor, activating the small muscles within the foot and building a strong, stable arch naturally.
Shoes, especially stiff, rigid ones, act like sensory deprivation chambers. They mute this vital feedback loop and can restrict the natural movement of the foot’s many bones and joints. From a physiotherapy standpoint, the rule is simple: barefoot is always the default indoors. Shoes should be reserved for protecting feet from unsafe surfaces or cold temperatures outdoors.
When shoes are necessary, the type of shoe matters immensely. A baby or toddler’s first shoe should be as close to barefoot as possible. It should function like a protective “second skin,” not a rigid cast. The goal is to allow the foot to move and feel the ground as naturally as possible, not to “support” the arch, which can prevent the foot’s own muscles from doing their job. Following a few simple guidelines ensures you choose a shoe that helps, not hinders, your child’s walking journey.
- Rule 1: Barefoot is always the default indoors for optimal sensory and muscular development.
- Rule 2: When shoes are required outdoors, they must meet the ‘Flexible, Flat, and Wide’ criteria.
- Check for Flexibility: The shoe should bend easily at the ball of the foot, where the foot naturally flexes.
- Ensure a Flat Sole: There should be no heel elevation or built-in arch supports. A toddler’s foot is naturally flat, and the arch develops through muscle use.
- Verify a Wide Toe Box: The front of the shoe should be wide enough for the toes to spread out naturally without being squished.
- Choose Soft-Soled Options: Prioritize soft, minimalist shoes over stiff, structured footwear to allow maximum ground-feel.
By shifting your perspective from “containing” your child to “enabling” their movement, you can transform your home into the most effective developmental gym possible. Start today by choosing one area or one skill to focus on, and begin architecting a space that says a resounding ‘yes’ to your child’s natural drive to explore and grow.